
If you want to make your own silver walnut ring then follow me through this article! We tried to document the process of making it as professionally as possible.
1. Cutting Silver Metal
If you need to make a silver walnut ring. The first step you need to take is to cut the silver to the size you want. Here you need to know a formula to calculate the length of silver you need. That is to use the inside diameter of the ring size you need plus 3.14 times the thickness of the silver. Remember, the dimensions calculated here are all in millimeters, so the size you come up with is also in millimeters.
2. Annealing and Pickling
After cutting the silver, we need to heat it with a flame torch until the surface of the silver takes on a reddish color like cherry. Afterwards, leave it for a while until its temperature drops a bit. The silver is then wrapped into a simple ring using a simple tool. This step prepares the silver ring to be soldered together later. Once it is done, it is placed in an acid wash solution.
3. Soldered Silver Ring
The soldering step requires some skill, and here is an easier way to do it. First, you need to place some flux on the metal you want to solder. Then you will use a moving gun to apply even heat around the perimeter of the interface until the seam of the silver ring closes up. Once the soldering is complete you will want to take the ring to an acid wash, this is done to remove any soldering tarnish that was just created during the soldering process. After completing this step we can turn on the next step.
4. Resizing the Ring
If you already know the size of the ring you are going to make, then I suggest you start off slightly larger than expected. Silver rings are very hot after soldering so we need to wait for it to anneal first. Then place the ring on a metal shaft and tap it with a small hammer until you get the desired size. Next, you can polish the inside and outside of the ring. You can use emery paper to polish the ring for an even shine. Of course, if you want to engrave some special characters or patterns on the surface of your silver ring, you can use a pneumatic engraver to engrave directly on the surface of the ring.
5. Handling Walnut
The steps are similar to those above for dealing with silver. You first need to have a piece of walnut and thin it. It is important that the walnut is not too thick, as overly thick boards can easily break during the winding process. Then you also need to make sure that the width of the walnut is about the same as the silver ring. Once it’s all ready you can glue the wood to the silver ring. All you need to do is to buy a can of medium-strength glue and that will already be perfectly enough.
6. Carve a Suitable Recess for the Inlay
If you want to make a style of ring like the one in the picture. Then you will need to use a carving knife or a carving machine to carve a deep enough groove in the walnut.
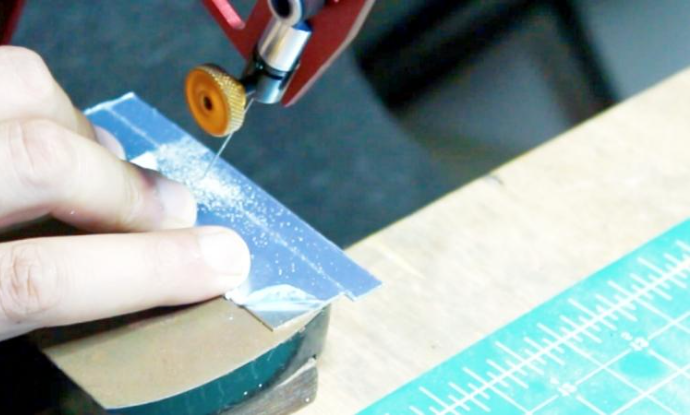
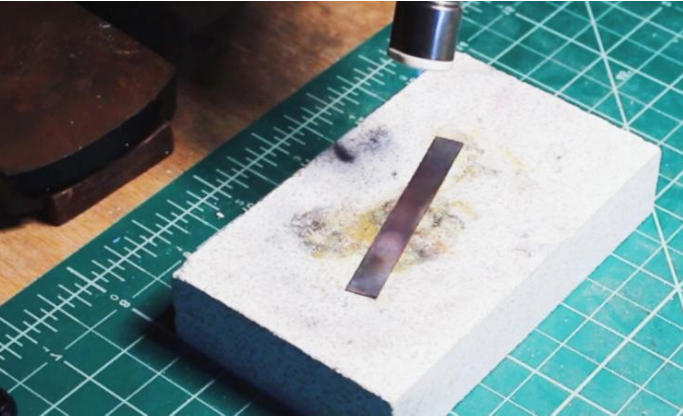
7. Inlaying Silver into Walnut
This is a process that requires constant experimentation. Because you can’t guarantee that the silver wire you make will be perfectly inlaid into the grooves carved in the previous step. However, you can’t make the wire too fine, because it won’t fit well into the walnut, and it’s aesthetically displeasing. This step also requires the use of glue for adhesion.
8. Strong Adhesive Treatment Ring
Since the wood is not very stable, you need to coat the surface of the wood with glue to prevent it from cracking. This process is usually repeated ten times, and you’ll also want to spray a little bit of activator in between each layer of glue as appropriate. The purpose of the activator is to prevent the glue from cracking.
9. Drilling Holes for Rings
Drilling is an essential step if you want to set a gemstone on your silver walnut ring. Of course, you likewise need to consider what the size of the gemstone you are setting is like before drilling.
10. Burnish
Here the polishing is done on the entire ring. Since the inside of the ring is made of a different material than the outside. Therefore, you will need to use two different polishing tools. Use emery to polish the inside of the paper silver ring, and use finer grit sandpaper to polish the walnut.
11. Set Your Favorite Gemstones
As mentioned earlier, if you love gemstones, you can carve a hole in the surface of the ring to set a gemstone. You can ask some professional jewelry experts if you don’t have any idea about the process of setting a gemstone. Then you can proceed with the gemstone setting.